
Note the Vibrati Punk Console kits are no longer available - these pages are kept for reference and interest. You can find the schematics and source code in these documents, but the PCB designs are not currently public.
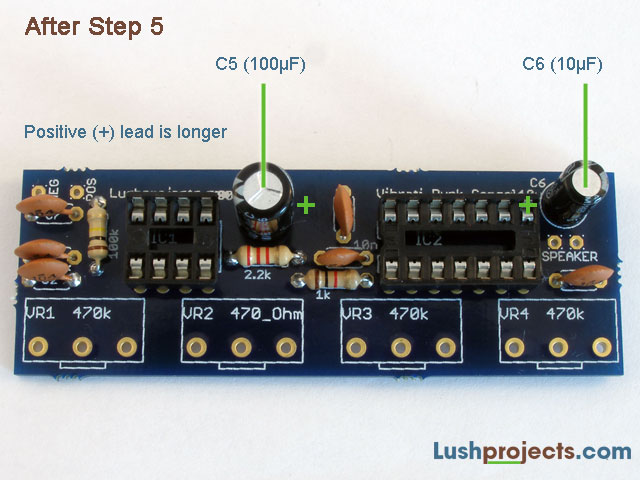
Build Step 5 - Add Big Capacitors
The Vibrati Punk Console has 2 larger capacitors
of a type
called “Electrolytic”. These have a polarity, a positive and a negative
lead,
and have to go in the circuit right way round. There are two ways to
determine
the polarity of this type of capacitor. The negative lead is shorter
than the
positive lead. Also one lead (normally the negative) is marked with an
arrow on
the side of the capacitor.
Identify the two capacitors as shown:
|
Capacitor |
Value |
Markings |
|
C5 |
100µF |
“100µF” |
|
C6 |
10µF |
“10µF” |
Solder each of these capacitors in to the board
with the
correct polarity. On the board the positive lead is shown with a “+”
sign and a
hollow bar. Insert the longer lead in to the hole marked with the “+”
sign.
Previous
Step 4
Step 4