
Note the Vibrati Punk Console kits are no longer available - these pages are kept for reference and interest. You can find the schematics and source code in these documents, but the PCB designs are not currently public.
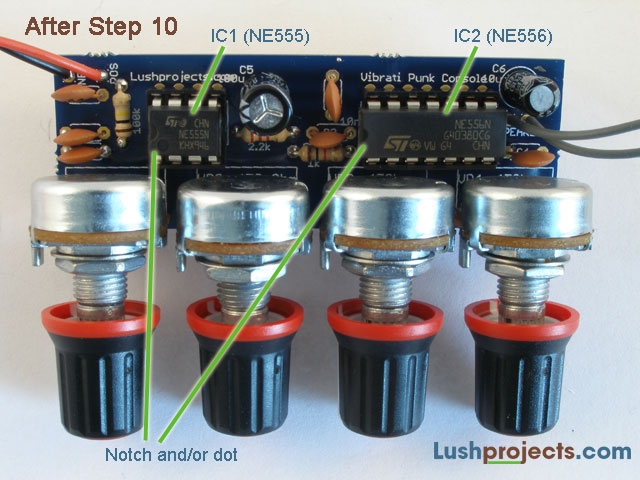
Build Step 10 - Inserting the Integrated Circuits (ICs)
In this step we’ll take the two Integrated
Circuits (ICs)
and insert them in to the sockets on the board. To get the ICs in to
the
sockets you’ll probably need to bend the pins so they are at
right-angles to
the body. To do this use a pair of small pliers or carefully bend the
pins
against a flat surface by holding the body and pressing the pins in to
position.
Align the IC with the socket and make sure that
the notch or
dot at one end of the IC corresponds to the notch in the socket. Make
sure all
the IC pins are over the slots in the socket. When everything is in
position,
press the IC down firmly in to the socket. Check that all the pins are
nicely
in the socket.
|
Integrated
Circuit |
Type |
Notes |
|
IC1 |
NE555 |
8 Pin |
|
IC2 |
NE556 |
14 Pin |
Previous
Step 9
Step 9