
Note the Vibrati Punk Console kits are no longer available - these pages are kept for reference and interest. You can find the schematics and source code in these documents, but the PCB designs are not currently public.
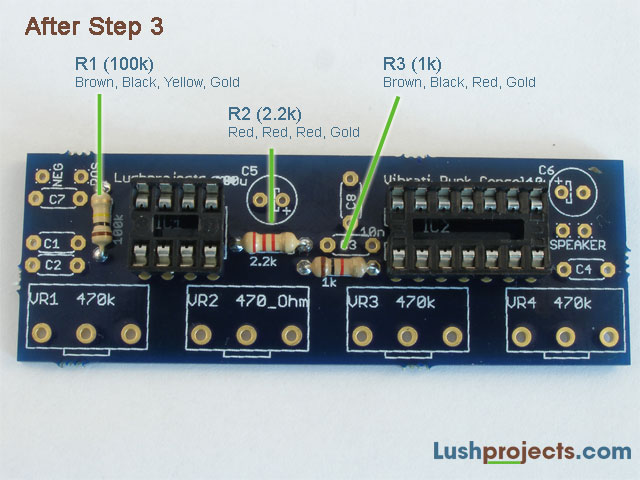
Build Step 3 - Add Resistors
The Vibrati Punk Console uses four Variable
Resistors to
control the sounds, but at this stage we are just going to add the
fixed
resistors. Fixed resistors are small cylindrical components with
coloured bands
that indicate the value of their resistance. Resistors can go in to the
circuit
either way around.
Using the advice in the “Soldering Is Easy”
booklet insert
the three fixed resistors where shown on the board. These are the
colours you
need to know:
|
Resistor |
Value |
Markings |
|
R1 |
100k Ohm |
Brown, Black,
Yellow, Gold |
|
R2 |
2.2k Ohm |
Red, Red, Red,
Gold |
|
R3 |
1k Ohm |
Brown, Black,
Red, Gold |
Previous
Step 2
Step 2