Lushprojects Blog
Projects in music, video, art, technology and learning-
Video circuit bending
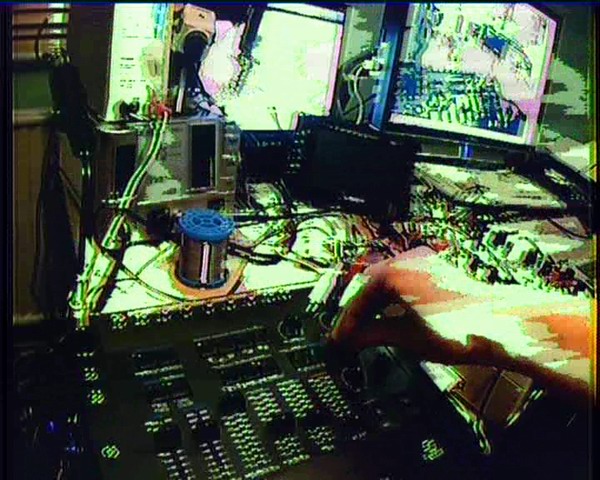
Posted on November 22nd, 2009 No commentsA post for the RSS followers – up on the main site is a new page for my circuit bent video mixers – including a new YouTube video for the latest completed project.
-
Lunar Lander – Back in Orbit
Posted on October 31st, 2009 No commentsDone a while back, but only just updated the blog….
After the big problems with Lunar Lander I ended up bringing the active parts home. In the nice calm environment of my study I worked through the problems. Turns out that the servos are fine. It seems to just be a loose connection that caused all the problems – groan! Anyway it was a good chance to make various small mods and improvements which should hopefully improve the robustness. It’s back on the Pier now.
In other news, Lunar Lander appeared on the Popular Science Blog, and I believe in the Novermber 2009 issue of the magazine.
Edit to add – also picked up by Gizmodo.
-
Houston we have a problem
Posted on September 27th, 2009 No commentsJust like the real moon rockets – Lunar Lander is a complicated machine and things are apt to go wrong. I took a trip over to Southwold to fix tangled fishing line and what appeared to be worn-out servo motors. Tangles were fixed easily enough, but even with new motors the lander was shaking all over the place when it shouldn’t be. The problem is probably caused by repeated flexing on one of the wires breaking the internal conductors – need to investigate that. Couldn’t properly diagnose the problem there, so ended up having to bring all the active parts back home.
On the one hand it’s interesting to see how problems develop and understand how to fix them. The downside is that the round trip to Southwold is about 6 hours and I am not sure it’s a viable machine to have to far from home. Anybody know somewhere in Berkshire that needs a unique Lunar Lander acrade game?
-
Circuit bent video mixer
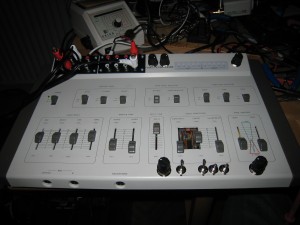
Posted on August 19th, 2009 No commentsComing up this weekend is Dorkcamp 2009 and I wanted to do something simple to take along. One of the themes is retro visuals for music, so a bit of analog video circuit bending seemed like a good idea. I got a Camlink 400 video mixer cheap off eBay. Turned out to be the perfect thing for circuit bending. The single sided PCB with all through-hole components is easy to work with. The circuit is pretty simple and is based around the Hitachi version of the uA733 video amp. Circuit bending video is a bit trickier than with audio – you have to keep a certain amount of the signal structure right or else the display just won’t be able to sync. I put gain boosts on the effects amps and also brought some of the trim pots to external controls.
This simple set up doesn’t have any way to align vsync from multiple inputs, so to allow me to overlay images I built a circuit to strip sync from an incoming signal and mix it in to the main video path. This means the incoming signal rolls as there is no sync, but it creates a good look.
Lastly I put in some circuits to control the blanking used for effects on/off and the wipe functions. Combining all the new circuits with a patch panel to extract and inject signals in different places you can get some really good effects.
-
Lunar Lander – one month in
Posted on August 19th, 2009 No commentsWe’re coming up to a month for Lunar Lander being on the pier. Like all things it’s had a fair share of teething troubles. The first problem was that the sound was too quiet, so the speakers and amp had to be upgraded. Other stuff isn’t proving quite so urgent. The servo motors are wearing which is giving it an bit of a judder on the rotation control. Also there is some intermittent problem between the monitor and the PC which causes the screen to go blank. Not really obvious what causes that. Anyway, not too bad for a start.
In other news I build a second Cyclepong which is now in the hands of Emma Freud. My first commission!
-
Three wheels good, four wheels bad
Posted on May 30th, 2009 No commentsLunar Lander is basically finished – just chasing the final bugs out. It will be on Southwold Pier soon. This phase of the build is really painful. You want to just relax and enjoy the job being finished. Instead there seems to be a never-ending list of niggles to tackle. The thought that gives me focus for all this is that it’s a lot easier to fix things at home than it is once the machine is over the other side of the country.
Today I did what I hope is the last major mechanical change. The linear bearing build around a DIY store towel rail was proving unreliable. The slide mechanism would randomly stick and sometimes stall the horizontal motor. In the true modern style I first went for the “if the hardware is broke, fix it in software” approach and slowed the maximum speed of the motor down to see if that helped. No luck unfortunately, so I decided to build a new bearing for the carriage to run on. The design I ended using was in fact the original one I intended to use but had rejected in favour of the towel rail. The new one uses a piece of aluminium angle as a guide with ball bearings to follow. First signs are that this new design is a lot smoother.
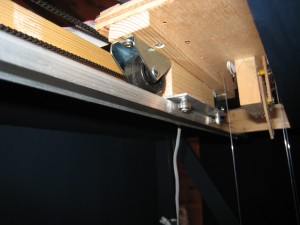
New Lunar lander bearing
Anyway, you might ask – where does the three wheels come in? As you might imagine, building with hand tools you can only achieve a certain level of accuracy. I normally aim for a 1mm tolerance unless I know I need something better. This creates a problem for modules that move on four wheels. Often you find that only three are in contact with the base at any one time, and it rocks back and forward like a dodgy pub table. I forgot this problem when I built the new carriage and initially gave it four wheels. Of course they didn’t fit properly and it moved annoyingly.
As anyone who’s studied 3D geometry knows, three points in space define a plane. Therefore modules that move on three wheels are always in contact with their base on all their wheels (unless they over balance of course). Lunar Lander ended up using this in two places. The redesigned carriage is a three wheeler and so is the disk for the badge dispenser. The problem with three wheels is that you need to think about the weight distribution carefully to prevent the whole module falling over. Keep the centre of gravity within the triangle defined by the wheels.
There is an irony in replacing the towel rail bearing – the dimensions of the original towel rail pretty much defined all the critical dimensions for the finished machine. Now it’s gone – taking the original rational for many of the design choices with it. Oh well, at least the new bearing fitted nicely in the original space.
-
Just a lick of paint and unexpected problems
Posted on May 4th, 2009 No commentsLunar lander is in in the home straight now (I hope)!
Most of the major cabinet work is done and paint has even been applied to most of it. Going for a “space age” silver which certainly hits the retina. The single spoke 2CV steering wheel gives it a certain panache to go with the “made in my shed” look.
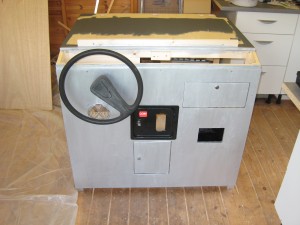
Lander Cabinet Base
As well as fun stuff like mounting the wheel the end forces you to do all the tedious things that you’ve ignored so far. In my case this meant adding proper handling for errors detected by the motor controls and designing labels for the cabinet and so on.
It’s also at this stage that nasty surprises crop up. I managed to break the winding mechanism by bashing it on the top of the cabinet. Then the repaired mechanism started to slip and had to be redesigned. Lastly I’ve got a “fuzz light” of ebay which is supposed to warn the operators of any problems with the machine. Trouble is it’s cheapo motor creates so much electrical noise that every time it switches on it scrambles all the control electrics. So far all attempts to fix it have failed. I am learning a lot about managing noise when interfacing microcontrollers to high current devices, but that isn’t really the goal of the exercise at this point.
Good news though – with almost all the lighting installed the game looks fab. The colour and visual impact of the back-lit main meters (speed and fuel) is great.
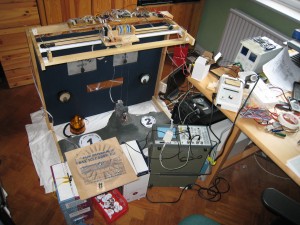
Still a few loose ends on the software – mainly creating the “idle mode” that will run to attract attention when nobody is playing the game. This means that the moving parts of the game and all the essential peripherals are packed in to my study.
-
Lunar Lander – exhaustive and exhausting, but on the home straight
Posted on April 19th, 2009 No commentsI’ve been pushing on with Lunar Lander as hard as possible – really want to get in finished now. All the effort is paying off finally.
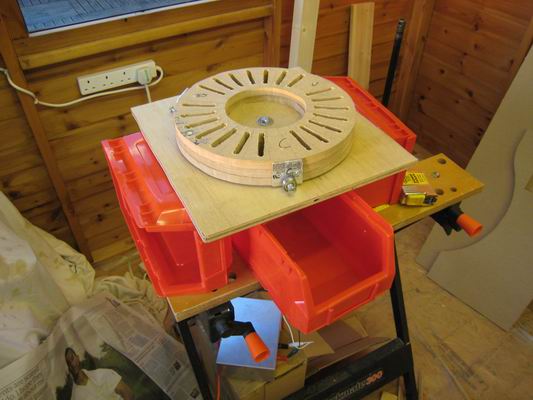
Mk 3 of the badge dispenser works, though had to be modified slightly when the badges I ordered were slightly wider than the ones I designed it for. It sounds funny if you look at the thing, but in some ways it’s the most precise engineering on the whole project. This version pushes the tolerances for hand-worked MDF a lot less far than the previous designs and is much more satisfactory as a result.
Even better news though. I addressed a lot of gaps in the software that needed to be fixed to make in in to an arcade machine. Features added:
- Tutorial so people can learn to play the game. This includes a demo capability to allow the machine to fly itself
- Highscore table
- Stats collection
- Improvements to the scoring and general game play
- Better graphics for the text display
And there is more. Major work has started on the cabinet. I’ve got as far as constructing most of the base and having the panels cut that will form the sides and shelves. The original plan was to design it so it will fit in the back of my van in one piece. I am now starting to think that the whole thing might be too heavy to do that so it may be that it can be deconstructed in to major sub units for transport. More thoughts on that as it develops I think.
Last but not least the backlighting for the meters is finished and I’ve designed new scales. The backlighting changes colour when you exceed the safe parameters. Inspired by a scene form “The Prisoner” I’ve stuck a big label saying “DANGER” in the excess speed zone. It looks fab.
Down to 13 items on the “To Do” list, but as some of those are things like “build cabinet” there is still a ways to go. I can finally see the finish line though!
-
Nixie hardware working (badge dispenser not!)
Posted on April 6th, 2009 No commentsGot the circuit board for the nixie tube control at the weekend. Built and worked first time (phew!). Just need to do the software for the AVR.
Things not going so well on the badge dispenser. Really reaching the limits of precision engineering on that one. There is enough flex in the carousel wheel that the badges can slide underneath and get stuck. Ideas for Mk3 design though…..
I also got around to coding a “demo” mode to teach people how to play the game. One of the learnings from Newcastle is it helps people a lot to understand if they see how the controls work first. The demo will land the lander on the first pad and provide guidance on what it’s doing. Something rather odd about writing a closed-loop control system for a physical system that is just being emulated on the same machine – but there you go. I actually cheated and added some helpful damping to the physics for the demo mode which isn’t there when humans play it. Too much effort to write a proper control system.
-
Last of the publicity from Maker Faire UK
Posted on March 25th, 2009 No commentsThe last bits of publicity from Maker Faire UK went out this week. BBC Radio 4 did a nice bit in their technology programme called “Click On”, then this excellent video of Lunar Lander went up on the BBC News technology web site. Note to self – try not to grin like a loon (hard though – this is fun).
Now my 15 minutes of fame is elapsed I can get on and make stuff. I’ve come up with a circular carousel design for the Lunar Lander badge dispenser which I think is going to work much better than the previous attempt.

