-
First Home Made PCB
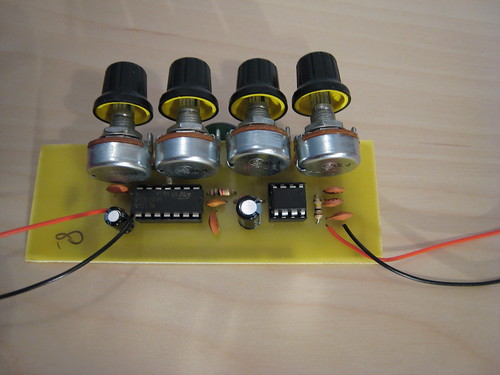
Posted on April 22nd, 2011 No commentsFor most of my projects I either need quite dense PCBs that I get professionally made or I use point to point wiring techniques. At the moment though I am working on a new electronics kit under the working title of “Vibrati Punk Console” which is kind-of an “Atari Punk Console 2.0”. To validate the PCB design before sending the first batch for manufacture I decided to make a home made board.
With great timing Matt Little had just done a PCB workshop at Nottingham Hackspace so I had good practical experience. Armed with a UV exposure box from the last DDRC Car Boot Sale and a set of parts from Rapid Electronics I went out to make my PCB.
I basically followed the tips from Mike Harrison’s guide. For etching I used the Seno GS etching system which manages to keep 99.999% of the really nasty stuff in a bag.
I was delighted that attempt number 1 yielded an almost perfect result.
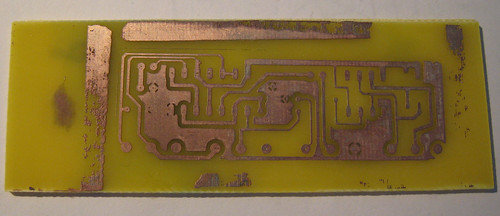
I made a second board as a backup, but that was a complete disaster. Once I developed the UV board you could see that the fine lines weren’t sharp and once I started etching they disappeared all together. Still not 100% sure what the problem was there. Possibly over-exposure to the UV or the mask not being completely flush to the board when it was exposed. Anyway one board was enough so as it was getting late I stopped there.
One thing I would note for future builds – the “automatic” pad size in Eagle is too small for home made boards. Use larger pads than the eagle defaults to make your life easier.
With the board drilled and everything mounted I am delighted to say it worked first time.