
Note the Vibrati Punk Console kits are no longer available - these pages are kept for reference and interest. You can find the schematics and source code in these documents, but the PCB designs are not currently public.
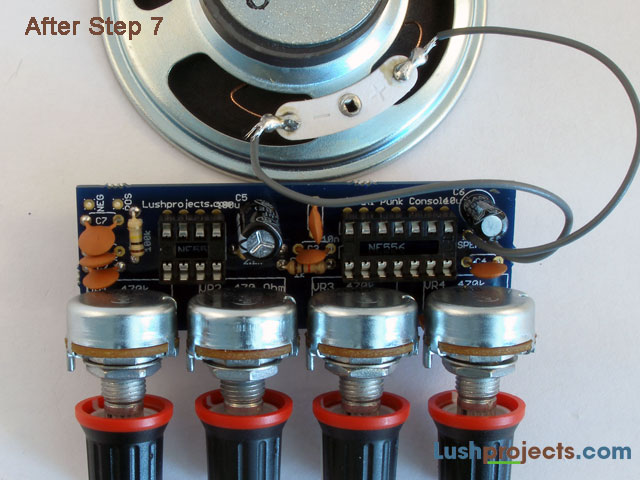
Build Step 7 - Connect the Speaker
Cut the grey wire provided in half to make two lengths. These are used to connect the speaker.
Strip about 5mm of insulation off each end of wires. You can strip
the wire
using a special wire stripping tool, or by gently scoring the
insulation with a
sharp knife and pulling the end off. Once you’ve stripped the wire
twist the
ends neatly.
Once you’ve stripped the insulation, solder one
end of each
wire to the tags provided on the back of the speaker. Thread the
stripped wire
through the hole in the tag and fold the end of the wire over to make a
mechanical join. Apply solder in the same way you did for soldering
components
to the circuit board.
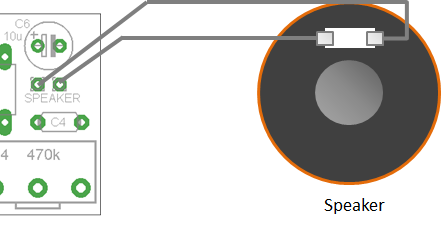
Now attach the other ends of the wires to the
circuit board.
There are two holes labelled “SPEAKER” at one end of the board where
these
wires connect. Thread the end of the wire through the board from the
component
side so that the insulation rests on the board. Solder the wire in
place like a
component lead.
NOTE: In situations where there are multiple
speakers it is
necessary to observe the polarity of the speaker in order to get the
correct
sound. As we only have one speaker for this project the leads can be
connected
either way round.
Step 6